
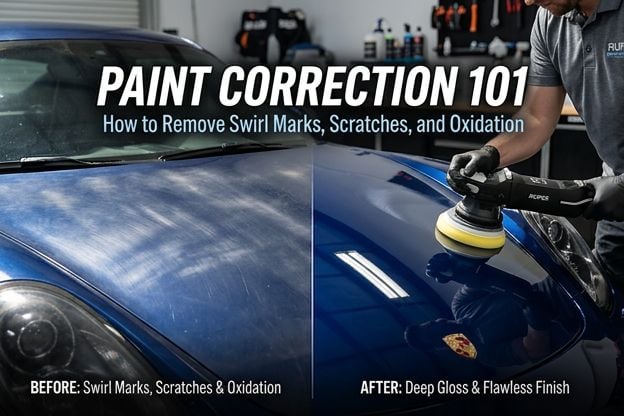

- Swirl marks are tiny scratches on your clear coat — not the base paint — which means they can be fixed through controlled abrasion without the need for repainting.
- The appropriate correction method is dependent on the depth of the damage: light swirls can be addressed with one-stage polishing, while deeper scratches and oxidation require two- or three-stage correction.
- Most drivers don’t realize how tough DMV weather is on paint — Maryland summers, Virginia winters, and DC’s stop-and-go traffic all speed up clear coat deterioration in ways that accumulate over time.
- DIY correction can yield good results on light damage, but deep scratches, severe oxidation, and pre-coating prep work can be significantly improved with professional IICRC-certified correction.
- Paint correction and ceramic coating are most effective when used together — securing a perfect surface under a protective layer that lasts three to five years.
You clean your car, take a step back to admire it — and there they are. A network of thin, circular scratches spread across the hood and roof, most noticeable in direct sunlight or under artificial lighting. They weren’t there when you purchased the vehicle. Now they persist regardless of how many times you wash and wax it.
Swirl marks are one of the most common and most misunderstood forms of paint damage on vehicles today. The good news is that in most cases, they’re completely correctable. The even better news is that once you understand what’s actually happening to your paint, you’ll know exactly what it takes to fix it and how to prevent it from happening again.
At The Car Shop in Laurel, MD, our team handles paint correction jobs on a weekly basis. We do everything from light one-stage polishing on daily drivers to full three-stage correction on show vehicles and pre-sale restorations. This guide will help you understand the process so you can make an informed decision about your vehicle’s paint.
Your Car’s Paint Is Trying to Tell You Something
Many drivers see paint damage as a mere cosmetic annoyance. But it’s really your vehicle’s top layer telling you that its protective shield is starting to deteriorate. Your car’s paint system isn’t just one layer — it’s a series of coatings, each with a particular function. When one layer begins to fail, the others are likely to follow suit soon.
Grasping the concept of the stack is the initial move towards comprehending the causes of swirl marks, their impact on your vehicle, and the mechanism by which paint correction undoes the harm.
The Causes of Swirl Marks, Scratches, and Oxidation
Swirl marks are usually caused by contact, especially the wrong kind of contact. Abrasive brushes in automatic car washes are one of the main culprits. Other causes include dry wiping a dusty hood with a microfiber cloth, using the wrong type of wash mitt, or using a circular polisher with a pad that’s too harsh for the paint. Even well-meaning detailing can lead to swirls if the technique isn’t quite right.
Oxidation is a unique issue that is caused by something different. It occurs when UV radiation breaks down the clear coat over time, which makes it appear chalky, hazy, or flat. You’ll usually notice it first on horizontal surfaces — the roof, hood, and trunk lid — because those panels get the most direct sunlight. In the DMV region, oxidation speeds up in the summer when the UV index readings often stay in the “very high” range for weeks at a time.
Scratches are a bit more complicated. Some are caused by physical contact, such as keys, road debris, or brushes in a parking lot. Others are caused by the same kind of cumulative abrasion that causes swirl marks, but they are concentrated in a single line rather than a circular pattern. The most important question to ask about any scratch is: how deep is it?
Understanding Clear Coat Damage vs. Paint-Through Damage
Starting from the metal and working out, your car’s paint system is made up of the primer, base coat (the color of your car), and clear coat. The clear coat is usually 50–100 microns thick and it’s the first line of defense against UV rays, moisture, and abrasion. Most swirl marks and light scratches are only in this layer, which is why they can be corrected without needing to repaint the car.
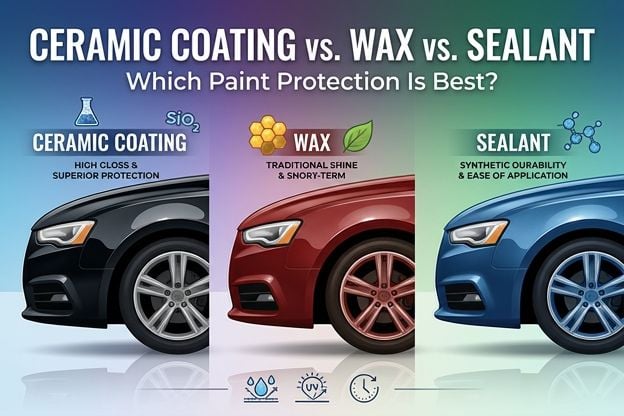
Damage that penetrates the paint is a different matter. If a scratch cuts through the clear coat and into the base coat — or worse, down to the primer or bare metal — polishing alone will not fix it. In these cases, you’ll need touch-up paint, spot blending, or in severe cases, a panel respray. A quick and reliable test to determine the severity of the scratch is the fingernail test: run your nail across the scratch. If it catches, the damage has likely broken through the clear coat. If your nail glides over it, correction is almost certainly possible. For more comprehensive protection, you might want to consider ceramic coating vs. wax vs. sealant options.
Understanding Paint Correction and Its Function
Paint correction is a process that involves carefully removing a small layer of clear coat to get rid of scratches, swirls, and oxidation present in it. Consider it as a form of precision leveling – rather than filling up the scratches, you are taking off the surrounding clear coat to match the level of the damage, then polishing it to bring back its shine.
This is why the thickness of the paint is so important before you begin. Each correction pass removes material. A vehicle with a factory clear coat in good condition has room for multiple correction sessions over its lifetime. A vehicle that has been polished aggressively in the past or one with a particularly thin clear coat from the factory has a much smaller margin for error.
Understanding the Art of Controlled Abrasion
Abrasive compounds operate by leveling out the microscopic peaks and valleys in the clear coat. The more aggressive the compound, the quicker it works, but the more finishing work you’ll need to do afterward to restore clarity. A heavy-cut compound used on soft paint can remove material quickly, but it leaves behind its own micro-scratches that must be refined out with a finer polish.
The basic idea behind multi-stage correction is that each stage uses a finer abrasive than the last to remove the marks left by the previous stage. This continues until the surface is perfectly smooth to the eye. When done right, the result is a finish that reflects light evenly and cleanly. This is what the industry refers to as “paint correction.”
The Three Steps: Cutting, Polishing, and Protecting
Typically, a full three-step correction begins with a heavy compound to eliminate the most severe defects — deep scratches, oxidation, water etching. The second step uses a medium polish to smooth the surface, removing the haze and micro-marring left by the cutting step. The third step applies a fine finishing polish to bring the paint to its maximum gloss level. Once the correction is done, a protective layer — wax, sealant, or ceramic coating — is applied to seal and protect the corrected surface.
Understanding What a Paint Thickness Gauge Reveals
When you use a paint thickness gauge (PTG), you’re measuring the amount of clear coat left on each panel, and this measurement is given in microns. This is an important step to take before starting any correction work, because the PTG reading will tell you how much you can work the paint without causing damage to the base coat. It’s also important to note that readings can vary between panels. For example, the readings on door edges, bumpers, and sections that have been repainted may be different from the readings on factory panels. For further protection, you might consider ceramic coating to maintain your vehicle’s finish.
Here at The Car Shop, each and every paint correction service we offer begins with a complete PTG evaluation of all panels. It’s not a choice. This is the step that if skipped, leads to paint being burned through, and it’s one of the most obvious distinctions between a professional correction job and one that’s been hurried.
Why Ignoring Swirl Marks, Scratches, and Oxidation Will Only Make Them Worse
Damage to your paint job isn’t a fixed problem. The swirl marks that seem like a minor irritation now are actually slowly eating away at the protective clear coat over your paint. Tiny scratches are like little rivers that let moisture, road salt, and UV rays get in more easily. What starts out as a bit of surface swirling can turn into a haze, then into oxidation, and finally into clear coat delamination — the point where your paint starts to flake and peel. For more detailed guidance, check out this paint correction guide.
Polishing cannot correct delamination. Once the clear coat and the base coat separate, the panel usually needs professional repainting. It is almost always cheaper to address the damage early.
How Sunlight Damages Clear Coat Over Time
UV radiation is the main cause of clear coat damage. The ultraviolet rays break down the polymer chains that make the clear coat hard and glossy. Over time — and faster if the car is parked outside without protection — the clear coat loses its ability to reflect light clearly, and it starts to oxidize. Darker colors show oxidation as a chalky haze; lighter colors often show it as a dull, lifeless look that wax can’t fix.
The DMV’s Weather: A Perfect Storm for Paint Damage
Those of us in the DMV area are no strangers to the harsh weather conditions. Our summers are hot, humid, and have a high UV index. These conditions put constant stress on your car’s clear coat from May to September. In Maryland, the average temperature in July often reaches the low 90s°F. The asphalt surface temperature can even exceed 150°F. This intense heat speeds up the chemical degradation of any coating on your car.
Winter weather can be tough on your car, especially if you live in Virginia or Maryland. As soon as the first freeze hits, the Department of Transportation starts applying sodium chloride and magnesium chloride to the roads. The problem is, these salts are hygroscopic, meaning they attract and hold onto moisture. If your car’s clear coat is already compromised, these salts can speed up oxidation and even get inside micro-scratches, making the damage worse from the inside out. To protect your vehicle, consider learning about ceramic coating vs wax vs sealant and find the best paint protection for your needs.
And let’s not forget about stop-and-go traffic. DC-area drivers are some of the most patient in the country, spending a large portion of their year stuck in traffic congestion. When you’re constantly starting and stopping, your vehicle is like a magnet for airborne brake dust, particulate matter, and exhaust contamination. These all land on the paint surfaces of your car and, over time, they can etch into the clear coat if they’re not removed quickly.
Did you know that each season presents its own unique threats to your vehicle’s paint? In the spring, tree sap, pollen, and acid rain can chemically etch into the clear coat. In the summer, UV radiation, heat, and humidity can lead to oxidation and clear coat breakdown. In the fall, falling debris and early frost can cause surface contamination and micro-scratching. And in the winter, road salt and freeze-thaw cycles can accelerate corrosion in scratches.
This seasonal cycle is why vehicles in the DMV area often show signs of paint degradation faster than vehicles in more temperate climates. It’s not just bad luck — it’s the forces of chemistry and physics working against your clear coat all year long.
How Ignored Paint Impacts Resale Value
When you’re selling your car, the paint job is one of the first things a buyer or dealer will look at. If they see swirl marks, oxidation, or visible scratches, they’ll think you haven’t taken good care of the car. That perception will lower the resale value of your car. Even if the mechanical condition of two cars is the same, the one with a better paint job will sell for more. And unlike many other factors that can affect a car’s value, you can control the condition of your car’s paint.
Selecting the Appropriate Paint Correction Method
Stage of Correction Level of Abrasiveness Defects Tackled Ideal For One-Stage Medium level polish Minor swirls, slight hazing Vehicles in good condition, pre-coating preparation on fresh paint Two-Stage Compound + polish Medium swirls, minor scratches, early stage oxidation Everyday vehicles with 2–5 years of usage Three-Stage Heavy compound + polish + finish Deep scratches, severe oxidation, water etching Paint that has been neglected, restoration before sale, vehicles for shows
One of the most prevalent errors made by vehicle owners is selecting the incorrect stage of correction — and it can go either way. Using a heavy compound on paint with minor swirls eliminates more clear coat than is required and results in unnecessary finishing work. Using a finishing polish on paint with severe oxidation yields little improvement and wastes both time and product. The first step is to honestly evaluate the current state of your paint.
When your paint appears dull in flat light but swirls are visible in direct sunlight, it’s probably a one- or two-stage job. If the oxidation is visible in any light and appears chalky, flat, and doesn’t respond to wax, it’s a three-stage job. If you see clear coat flaking or deep scratches that your fingernail catches, no amount of polishing or stages will fix the problem.
Here’s a good place to start: give the car a good wash, use a clay bar on the surface to get rid of any bonded contamination, and then take a look at the paintwork under a high-intensity LED light, holding it at a low angle. What you see under these conditions is what you need to correct. If you don’t use a clay bar before doing this, you might mistake contamination for clear coat defects, which would make you think you need a stronger compound than you actually do.
Understanding One-Stage, Two-Stage, and Three-Stage Correction
One-stage correction is a quick process that uses a medium-cut polish to lessen light swirl marks and restore a moderate level of gloss. It’s a faster process that removes less clear coat, and it’s a good option for vehicles that have been well maintained. Two-stage correction is a bit more intensive. It starts with a heavier compound pass, then refines the surface with a polish. This two-step process can address defects that a finishing polish alone can’t touch. Three-stage correction is the most thorough process. It adds a dedicated finishing step after the compound and polish stages. This brings the surface to its maximum level of optical clarity before any protective coating is applied. Each additional stage adds time to the process and removes slightly more material. That’s why it’s important to assess the thickness of the paint before you choose a correction process.
Understanding When to Use DIY Correction and When to Avoid It
For minor to moderate swirl mark removal, DIY correction is a valid choice, provided that there is enough clear coat left on the car. The introduction of modern dual-action polishers, also known as DA polishers, has made the process much easier than it was a decade ago. Unlike a rotary machine, a DA polisher oscillates instead of spinning in one direction, significantly lowering the chance of burning through the clear coat. If you’re careful and patient, and your car only has minor defects, you can achieve some seriously impressive results.
When it comes to the condition of the paint, the game changes. If the clear coat is thin, there’s heavy oxidation, deep scratches, or the paint has been corrected several times before, the risk increases significantly. If you’re too aggressive with the compound on a panel that only has 60 microns of clear coat left (which is below the factory average of 80-100 microns), you could burn through to the base coat in one go if your technique isn’t perfect. That’s not detailing, that’s a repair bill. For those considering protective measures, understanding ceramic coating can be invaluable.
The speed of the machine, the pad you choose, the aggressiveness of the compound, and the temperature of the panel are all factors that work together. If you get any of these wrong on a panel that’s already compromised, you can cause immediate, irreversible damage. This is the difference between what a dual-action polisher makes look easy and what actually requires trained hands and a paint thickness gauge in hand.
Another factor to consider is the quality of the finish. A professional correction job, using a rotary or forced-rotation machine, and then a DA finishing stage, can achieve a level of optical clarity that’s hard to match with a consumer-grade DA polisher alone. For a daily driver getting a one-stage refresh, that difference might not be noticeable. But for a vehicle that’s going to be ceramic coated — where any remaining defects will be permanently sealed in under the coating — it’s a big deal.
- DIY correction is reasonable for light swirl removal on well-maintained paint with adequate clear coat thickness
- A dual-action polisher is the appropriate tool for home use — rotary machines require significantly more training and experience
- Always clay bar before polishing to avoid dragging bonded contamination across the paint surface
- Work in a shaded area with panel temperatures below 80°F — heat accelerates compound flash time and reduces working window
- Professional correction is strongly recommended before any ceramic coating application to ensure defects aren’t sealed beneath the protective layer
Cutting Compounds, Polish, and Pads: Matching the Right Products to Your Damage
Product matching is where DIY correction either succeeds or fails. A heavy compound like Meguiar’s M105 or 3M Perfect-It paired with a foam cutting pad will remove significant material quickly — appropriate for deep oxidation, not appropriate for a lightly swirled black sedan. A finishing polish paired with a soft foam finishing pad refines the surface after compounding and is the final step before protection. Microfiber cutting pads cut more aggressively than foam at the same compound level, which is useful for severely oxidized panels but requires a careful hand. When in doubt, start with the least aggressive combination that could plausibly address your damage level and step up only if needed.
A Guide to Paint Correction for DMV Drivers
Drivers in DC, Maryland, and Virginia have more than just the regular wear and tear to contend with. The unique combination of climate, traffic, and road treatment conditions in these areas can cause paint to degrade faster than the national average. This means that the frequency of correction, the choices for protection, and the actual needs of your paint may be different from what a general guide written for a temperate climate might suggest. For more detailed insights, you might want to explore Paint Correction 101 to keep your car’s shine like new.
How Maryland Summers and Virginia Winters Damage Your Clear Coat
Maryland summers bring constant heat and high humidity. This combination puts stress on the clear coat by causing it to expand and contract with the heat. It also keeps the surface moist enough for airborne contaminants to bond quickly. UV intensity in the mid-Atlantic is at its highest between May and September. Vehicles that are parked outside without ceramic coating or paint protection film are constantly absorbing this radiation across horizontal panels. Virginia winters bring road salt that stays active on paint surfaces long after the roads have dried out. This is especially true in door jambs, lower panels, and anywhere water collects and evaporates repeatedly. The cumulative effect of four full seasons of active chemical and physical stress means DMV vehicles typically need paint correction more frequently than vehicles in the Southwest or Pacific Northwest.
Why City Driving Creates More Surface Contamination Than Highway Driving
When you’re driving at high speeds, most airborne particulates will fly over the surface of your vehicle. However, if you’re stuck in stop-and-go traffic — something that’s all too common for drivers in the city — your vehicle is sitting still or nearly still in dense exhaust, brake dust, and road particulate for extended periods of time. Brake dust is particularly aggressive, as it’s a mixture of carbon residue and metallic particles that can bond to paint surfaces rapidly and start oxidizing on contact when it’s warm and airborne. After months or years of daily commuting in city traffic, this contamination can build up into a layer that standard washing can’t fully remove and that can abrade the clear coat during every subsequent wash if it’s not addressed.
Keeping Your Paint Looking Great in All Four Seasons
Once you’ve corrected your paint, the best thing you can do is protect it with a durable layer. Wax provides protection for three to six weeks, which is fine for cars that are only driven occasionally or show cars that aren’t exposed to the elements often. Paint sealants provide protection for four to six months. Ceramic coating is the right choice for any car that’s driven regularly in DMV conditions. A professional ceramic coating chemically bonds with the clear coat to create a hydrophobic, UV-resistant barrier. It lasts for three to five years under the warranty-backed packages offered by The Car Shop.
Protection is important, but the way you wash your car is just as crucial. The two-bucket wash method — one bucket for soapy water, one for rinsing your mitt — helps to avoid the most common cause of new swirl marks: dragging dirt and debris back across the paint. If you have corrected paint, it’s better to use a touchless car wash than an automatic brush wash. And if you live in Maryland or Virginia, rinsing road salt off the lower panels within 48 hours of a salt event can slow down the rate at which that contamination gets into any remaining surface imperfections, especially in the winter.
Why The Car Shop’s Professional Paint Correction Outperforms DIY
The gap between professional and DIY correction isn’t only about equipment — it’s about the combination of tailored tools, expert technique, and a methodical process that considers factors most home detailers don’t account for. At The Car Shop, every correction service starts with a comprehensive paint thickness gauge assessment across all panels. This information guides every product and pad selection decision, every machine speed setting, and every decision about how aggressively to treat a specific panel. IICRC-certified technicians carry out all correction work — a certification that necessitates proven expertise in surface preparation, abrasive technology, and coating application, not just product knowledge.
The end result is a finish that’s hard to match without the right tools, training, and process. But what’s even more important is that it’s backed by a guarantee. When The Car Shop does correction work followed by a ceramic coating, that coating comes with a 3-year or 5-year warranty — because it’s only logical if the correction work underneath is done to a standard that the shop supports. Check out all of the paint correction and ceramic coating services and pricing to find the best package for your car’s condition and your protection goals.
What IICRC-Certified Technicians Mean for Your Vehicle’s Paint
At The Car Shop, IICRC (Institute of Inspection, Cleaning and Restoration Certification) isn’t just a marketing term. It’s a certification that requires technicians to prove their knowledge of surface chemistry, abrasive technology, and coating application through formal examination. All of our paint correction and coating services are performed by IICRC-certified technicians. They not only know how to operate a polisher, but they also understand why certain pad and compound combinations behave differently on soft European paint compared to hard Japanese clear coats. They also know how to adjust their technique accordingly.
- Full paint thickness gauge assessment on every panel before any correction begins
- Product and pad selection driven by actual paint condition data, not guesswork
- Rotary and forced-rotation machine capability for professional-grade defect removal
- Multi-stage finishing process to maximize optical clarity before any protective coating is applied
- Final inspection under high-intensity LED lighting to confirm defect removal before the vehicle leaves the shop
This process matters most when ceramic coating follows correction. Any swirl mark, scratch, or haze remaining in the clear coat at the time of coating application gets locked in permanently beneath the ceramic layer. The coating doesn’t hide defects — in many lighting conditions, it amplifies them by increasing the surface’s reflectivity. Correction done to a professional standard eliminates that risk entirely.
Why choose certified technicians over general detailers? It’s not about credentials, but about the accountability that comes with every step of the process. When the person working on your paint correction has passed a formal competency exam and follows a documented process, the results are both more consistent and more predictable than correction performed by someone who is simply following product instructions.
3-Year and 5-Year Warranty-Backed Ceramic Coating After Correction
After the correction process, ceramic coating is the best protection you can get for your car’s paint. The Car Shop offers ceramic coating packages that come with 3-year and 5-year warranty-backed tiers. This isn’t an estimate or marketing gimmick, but a genuine protection plan backed by the shop’s work. The coating chemically bonds to the corrected clear coat, forming a semi-permanent hydrophobic layer that repels water, blocks UV radiation, resists chemical etching from road salt and bird droppings, and makes every subsequent wash dramatically easier. For DMV drivers dealing with the stress of four-season paint, the math on a 5-year coating versus annual wax applications is simple: better protection, less maintenance, and a finish that holds up through Maryland summers and Virginia winters without constant attention.
No Hidden Fees, No Surprises
At The Car Shop, all of our paint correction and ceramic coating packages are priced to include both parts and labor. We believe in transparency, so you’ll know exactly what you’re paying for, the level of correction your vehicle’s paint needs, and the total cost before we start any work. We even use a paint thickness gauge to assess the condition of your vehicle’s paint. If it turns out that a two-stage correction is necessary, we’ll let you know before we start, not after.
Schedule Your Paint Correction Session in Laurel, MD
Are you prepared to revive your paint and shield it appropriately? Schedule your session at The Car Shop — visit thecarshopmd.com/book-now or dial (240) 929-7704. You can find us at 10075B N 2nd St, Laurel, MD 20723, we serve vehicle owners throughout DC, Maryland, and Virginia. We accept walk-ins if we have openings.
Common Questions About Paint Correction
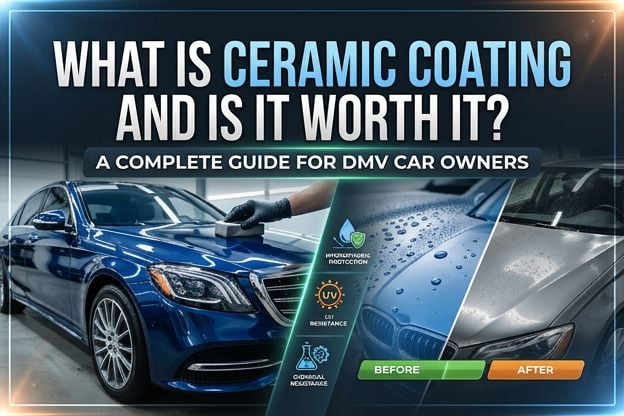
Paint correction can be confusing, especially if you’ve never done it before. We’ve answered some of the most common questions we get from car owners in the DMV area below, covering everything from what can be fixed to how often you should get paint correction if you drive your car every day. For a deeper understanding, you might want to explore what ceramic coating is and if it’s worth it for your vehicle.
Not finding what you’re looking for? The crew at The Car Shop is ready to help. Give us a call at (240) 929-7704 or reach out through our booking page at thecarshopmd.com. We’re here to provide clear answers, not to sell you something you don’t need.
Is it possible for paint correction to eliminate deep scratches that snag your fingernail?
When a scratch snags your fingernail, it’s a good sign that it’s penetrated the clear coat and reached the base coat or primer underneath. The process of paint correction involves removing clear coat to the depth of the scratch. However, if the scratch goes beyond the clear coat, no amount of buffing will make it vanish.
Simply put, if a scratch is deep enough to catch your nail, it won’t be corrected with polish alone. Depending on the depth of the damage, you may need paint touch-up for isolated chips or scratches that reach the base coat, spot blending for larger affected areas, or a panel respray if the damage is extensive or the surrounding paint is too degraded to blend effectively.
However, the fingernail test isn’t foolproof. Some scratches might catch a bit but haven’t fully penetrated the clear coat. These scratches might be partially corrected, reducing their visibility significantly, even if they can’t be completely removed. A professional evaluation with the right lighting and a paint thickness gauge will give you a straightforward, honest answer about what can be achieved before any work starts.
It’s important to note: correction involves removing clear coat to even out the surface. It’s only effective within the depth of the clear coat. If damage extends beyond that layer, you’re looking at paint repair, not correction. These two services are not interchangeable as they tackle different issues.
- Scratches that catch your fingernail have typically broken through the clear coat
- These require touch-up paint, spot blending, or panel respray — not polishing
- Scratches that your nail glides over are strong candidates for correction
- Borderline cases benefit from professional assessment before committing to either approach
- Attempting to polish through a deep scratch can thin the surrounding clear coat dangerously without improving the scratch appearance
How long does professional paint correction take?
A one-stage correction on a standard sedan typically takes four to six hours. Two-stage correction runs eight to twelve hours depending on vehicle size, paint condition, and the number of panels requiring significant defect removal. Full three-stage correction on a large vehicle with heavy oxidation or extensive scratching can run one to two full days. These timelines account for the wash and decontamination stage, paint thickness gauge assessment, the correction work itself, and final inspection — not just machine time on paint. Rushing any stage produces a lower-quality result, which is why correction isn’t a same-day service for anything beyond a light one-stage polish.
How frequently should you get paint correction for your car?
For the majority of everyday drivers, getting paint correction every two to three years is a sensible guideline — provided that the car is kept up with correct washing methods and safeguarded with a minimum of a high-quality sealant between correction sessions. Cars with ceramic coating usually need correction less often because the coating absorbs the majority of environmental damage that would otherwise build up directly on the clear coat.
However, the more precise answer is that the frequency of correction should be dictated by the condition of the paint rather than a predetermined schedule. A vehicle that is kept in a garage, hand washed with the correct technique, and covered with a 5-year ceramic may not require correction for the entire duration of that coating. A vehicle that is used daily, frequently goes through automatic brush washes, and is parked outside all year in the DMV may benefit from a light one-stage refresh every 12 to 18 months.
The thickness of the clear coat is the most crucial factor to consider. Each time you correct the paint, you’re removing some material, and that material isn’t going to grow back. Before you start a correction session, you should use a paint thickness gauge to see how much clear coat you have left. This will help you decide how hard you can go on the paint. If a car has been corrected too many times or if the clear coat was thin to begin with, you might reach a point where you can’t correct the paint anymore. At that point, your main goal should be to protect the paint that’s left.
- Ceramic-coated vehicles typically need correction less frequently — protection reduces clear coat wear
- Proper wash technique between sessions is the single biggest factor in how quickly new swirl marks develop
- Paint thickness gauge readings should inform correction decisions — not just appearance alone
- DMV weather conditions generally mean more frequent attention than national averages suggest
Is paint correction worth it before applying ceramic coating?
Yes — without exception. Ceramic coating bonds directly to the clear coat surface and enhances its reflectivity. Any defect remaining in the paint at the time of application — swirl marks, fine scratches, hazing — becomes permanently locked beneath the coating and, in many lighting conditions, becomes more visible because the coating amplifies surface reflectivity. Applying ceramic coating over uncorrected paint produces a high-gloss version of a flawed finish, not the deep, mirror-like result most vehicle owners are expecting. Correction before coating is not an upsell — it’s the logical prerequisite for getting the result that makes ceramic coating worth the investment in the first place.
How do paint correction and paint touch-up differ?
Paint correction and paint touch-up are designed to fix different types of damage, and they do so using entirely different methods. The aim of correction is to remove the clear coat to get rid of any defects that are present in that layer, such as swirl marks, light scratches, oxidation, and water etching. No new material is added to the car. The clear coat that is already there is leveled, refined, and polished to restore the optical clarity of the paint. When done properly, the result is a finish that looks just like the factory-new paint under most lighting conditions.
Unlike paint correction, touch-up paint adds material to fill in damage that has gone through the clear coat to the base coat or primer. It’s typically used for stone chips, deep scratches, and any damage where the underlying color layer is exposed or bare metal is showing. Touch-up work can be as simple as chip repair with a brush applicator or as complex as professional spot blending with an airbrush or spray gun, depending on the size and location of the damage. The goal here is coverage and corrosion prevention, not the optical perfection that correction can achieve on clear coat damage.
Here’s a simple rule of thumb: if the damage is within the clear coat, correction is the answer. If the damage breaks through the clear coat, touch-up paint or panel respray is required. Many vehicles need both — correction across most panels combined with touch-up work on specific chips or deep scratches — which is why a thorough pre-service assessment is essential before any work begins. The Car Shop evaluates both during the initial inspection so the right approach is applied to the right damage from the start.
When it comes to professional paint correction, ceramic coating, window tinting, and automotive customization, the DMV trusts The Car Shop in Laurel, MD. We serve vehicle owners across DC, Maryland, and Virginia with certified technicians, transparent pricing, and warranty-backed results. Follow us on Instagram and Facebook at @thecarshopcustoms.
Paint correction is an essential process for car enthusiasts who want to maintain the pristine look of their vehicles. This process involves removing imperfections such as swirl marks, scratches, and oxidation from the car’s paint surface. To achieve the best results, it’s crucial to understand the different types of paint protection available. For instance, choosing between ceramic coating, wax, or sealant can make a significant difference in how well your car’s paint is protected over time.

 By
By